Class Roster Upload
Edcite allows teacher to add students to their class(es) using a file upload. This is useful if you get class rosters from other systems (SIS, LMS, etc.) used in your school or district.
Prepare Your Roster
1. Edcite requires 5 columns of data in the file. A header row with the column title is needed. You can use a sample file to help you! Here is a sample file.
Upload Your Roster
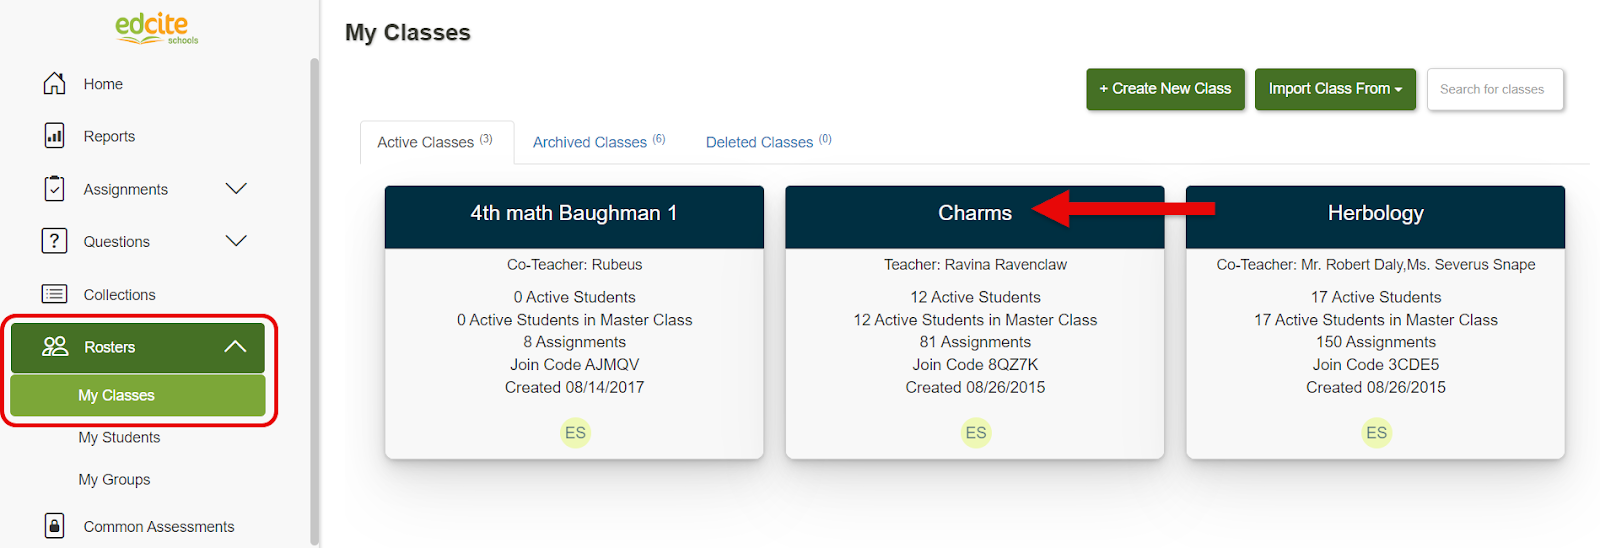
2. From the navigation bar on the left of our screen, select Rosters.
3. Click on the name of the class you for which you would like to upload the roster.
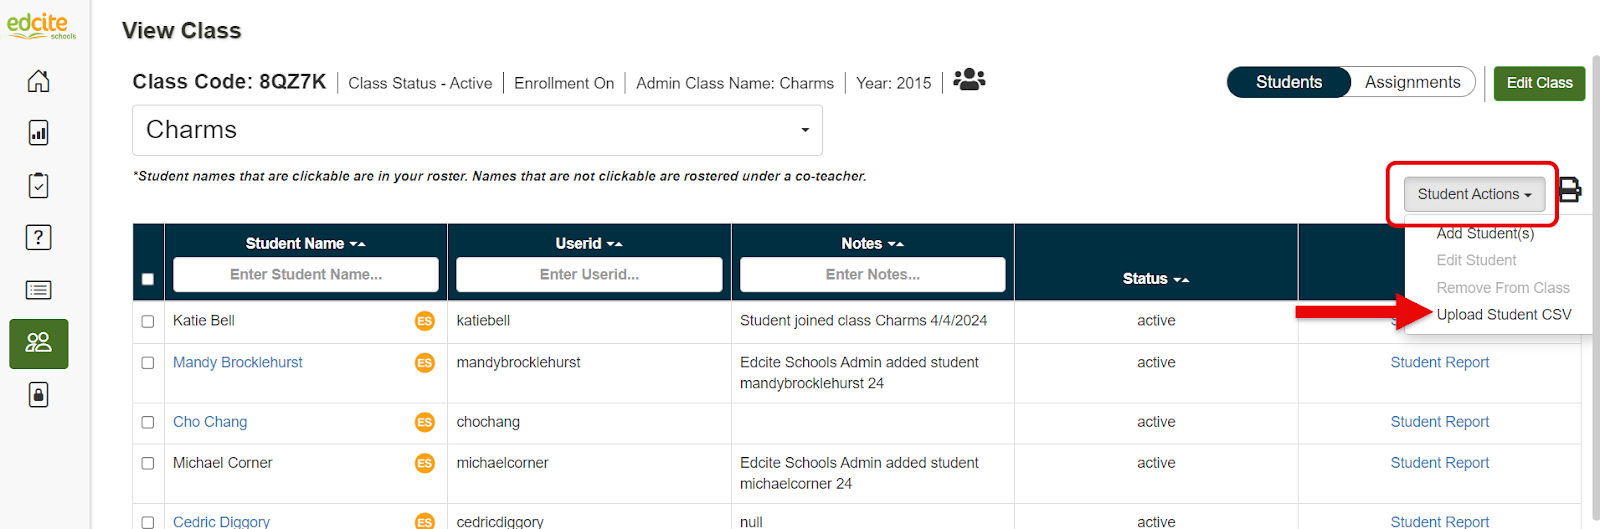
4. Near the top right of this tab, select Student Actions, and then choose Upload Student CSV from the dropdown.
5. The File Upload page will open. Click the Upload File button on the right of the pop up.
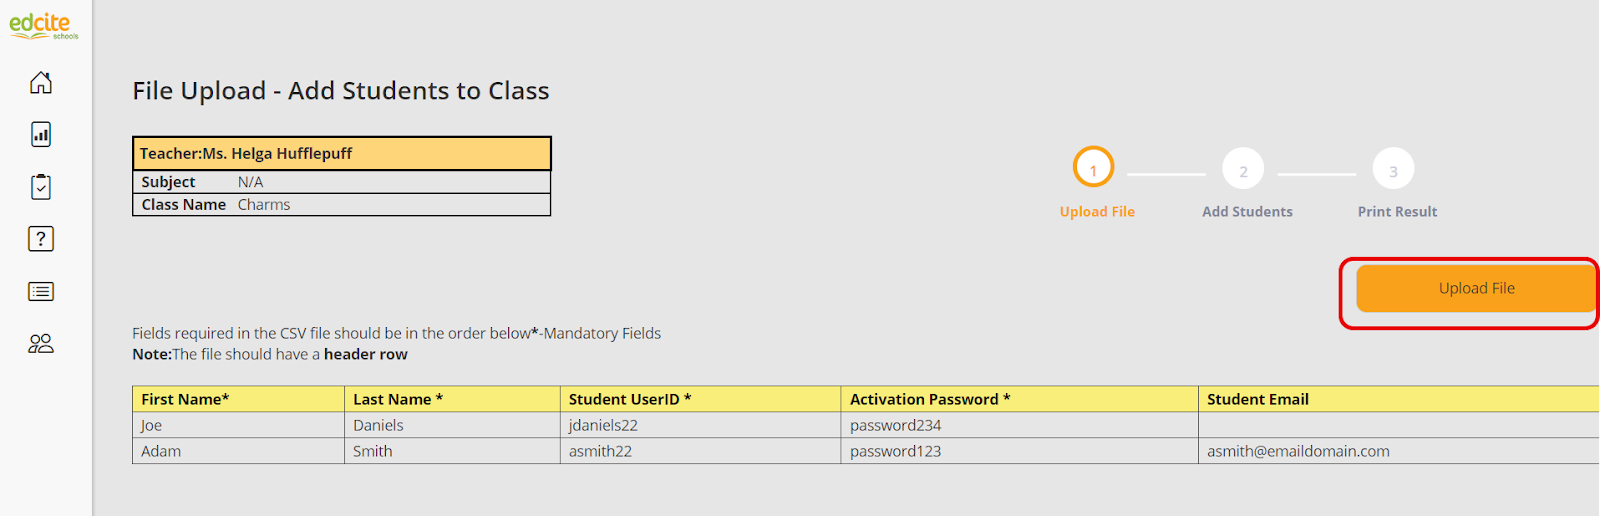
6. Select the file from your computer and click the Open button. The student data from your file will upload into your class.
Related Articles
Admin/Sub Admin - How to Upload a Roster into Edcite Schools via CSV [Edcite Schools Feature]
This feature is available as part of our premium platform, Edcite Schools. To learn more about Edcite Schools, click here. Follow these step by step instruction to upload your Roster into your Edcite Schools account. Note: this must be done from the ...Admin Upload with Google Classroom [Edcite Schools Feature]
This feature is available as part of our premium platform, Edcite Schools. To learn more about Edcite Schools, click here. Administrators should follow these step by step instructions when setting up their Edcite Schools account to sync with Google ...Where to Find a Class's Class Code
Class Codes are used by students to join a class. 1. From your navigation bar on the left of your screen, click on Roster and then select My Classes. 2. Click on the class name for which you would like to find the Class Code. When the class opens, ...Add a Student to a Class
1. From the navigation bar on the left of your screen, select Rosters and then click My Students. 2. You will be navigated to your Class Dashboard where you will see a list with all of your students. Select the students you would like to add to the ...How to Create a New Class
Teachers are able to manually create a new class on Edcite, or import classes from Google Classroom or Clever. Manually Create a Class on Edcite: 1. Click on the +Create New Class button found near the top right of your Homepage. 2. Add the class ...